Have you ever wondered how to enhance your Odoo website with features that go beyond the standard toolbox? Today, we're focusing on a custom widget integration that can significantly elevate your site's functionality and user engagement. Whether you're overseeing a golf course or running an ecommerce platform, our guide will show you how to seamlessly incorporate a unique feature: an Image Hotspot widget. Let’s dive into the step-by-step process of making your website not just functional, but interactively engaging!
Understanding the Image Hotspot Widget
An Image Hotspot widget is an innovative tool that enables interactive elements to be embedded directly onto images on your site. This functionality is perfect for enriching your website's content, allowing users to explore detailed views or discover product specifics intuitively, without overwhelming navigation.
Step-by-Step Guide to Creating a Widget with Common Ninja
Utilizing the right tools is crucial, and Common Ninja offers a straightforward and effective platform to create your custom widget. Here’s how to get started:
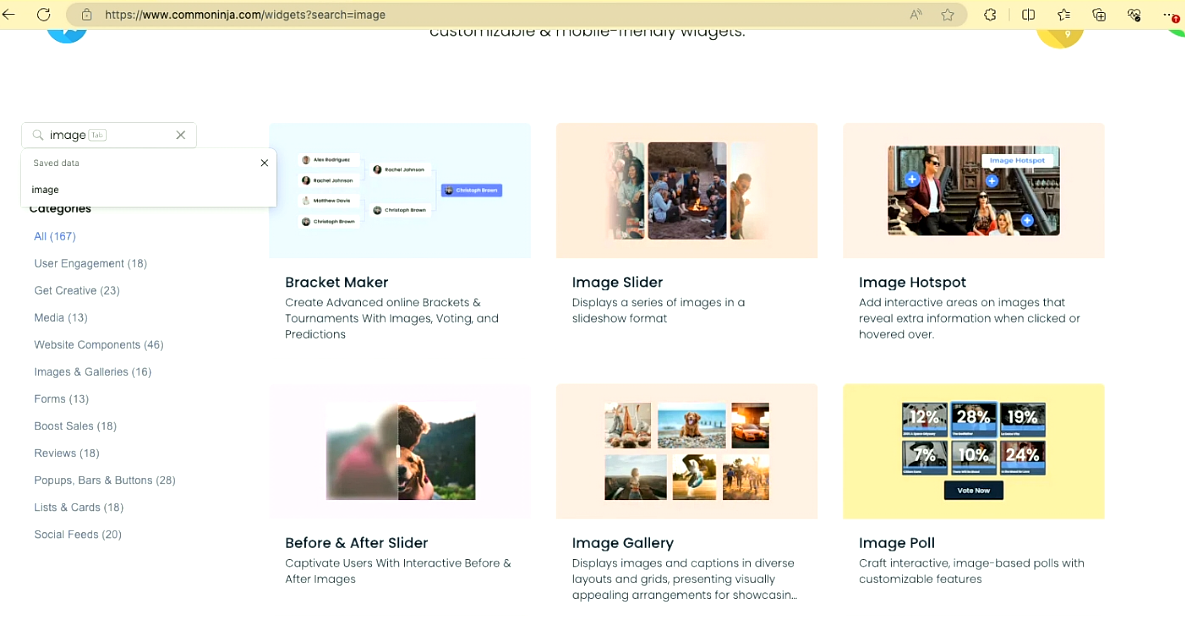
- Visit Common Ninja: Navigate to Common Ninja, which provides a plethora of customizable widgets suitable for various applications.
- Choose the Image Hotspot Widget: From the available options, select the Image Hotspot widget. This tool is incredibly versatile, ideal for both e-commerce sites and informational platforms.
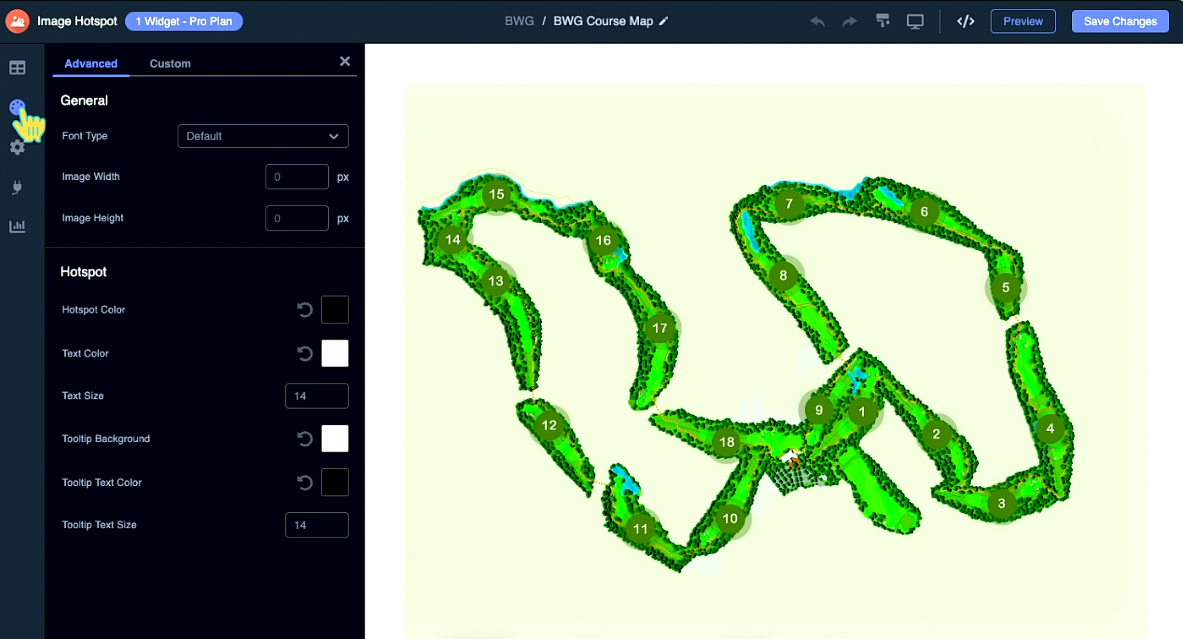
3. Customize Your Widget: Upload the desired image (e.g., a map or product photo) and add interactive hotspots. These can be configured to display videos, statistics, additional images, or text, making your image a rich source of engagement.
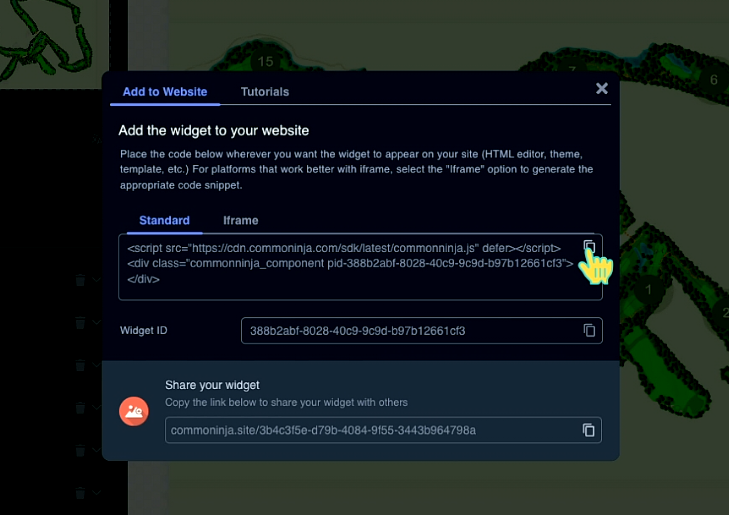
4. Generate the Widget Code: After customizing your widget to your satisfaction, generate the HTML code that will be used for embedding the widget into your website.
Integrating the Widget into Your Odoo Website
With your HTML code in hand, embedding it into your Odoo site is straightforward:
- Access the Website Editor: Log in to your Odoo site and go to the page where you want the widget.
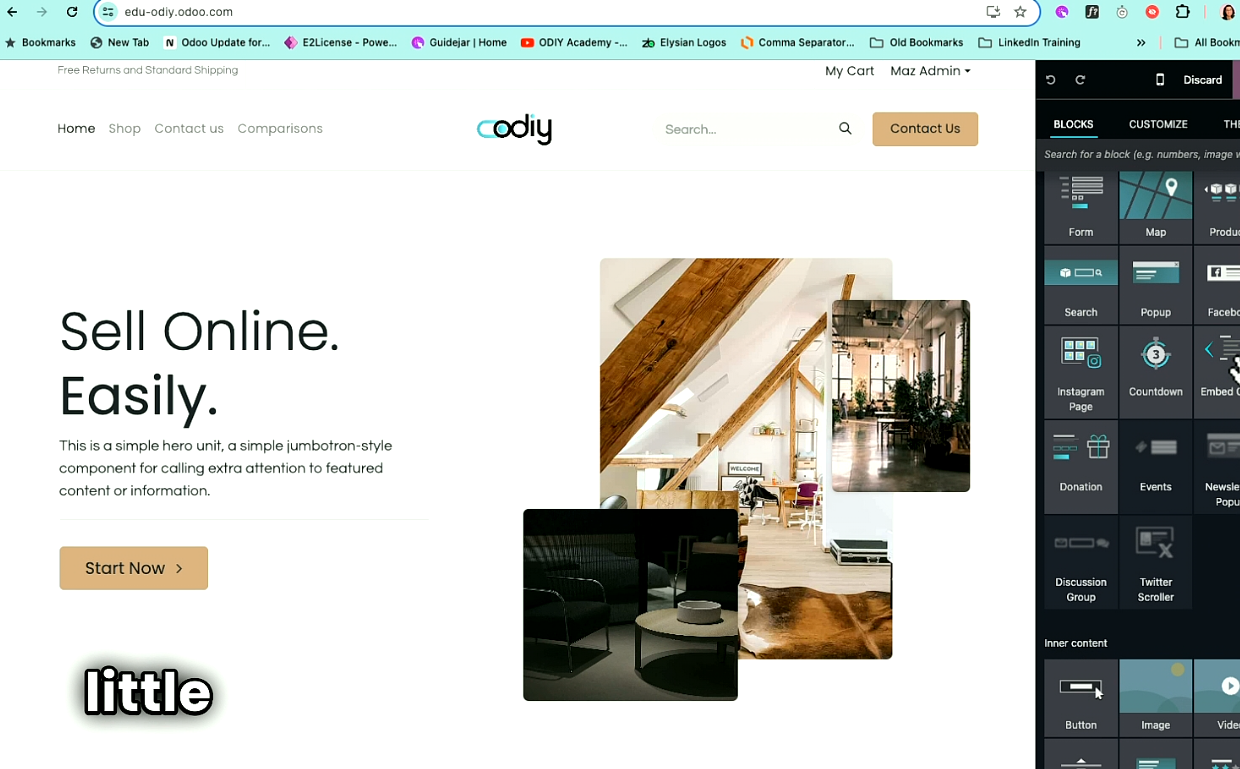
- Use the ‘Embed Code’ Block: Drag the ‘Embed Code’ block to your desired location on the page and paste the widget code from Common Ninja.
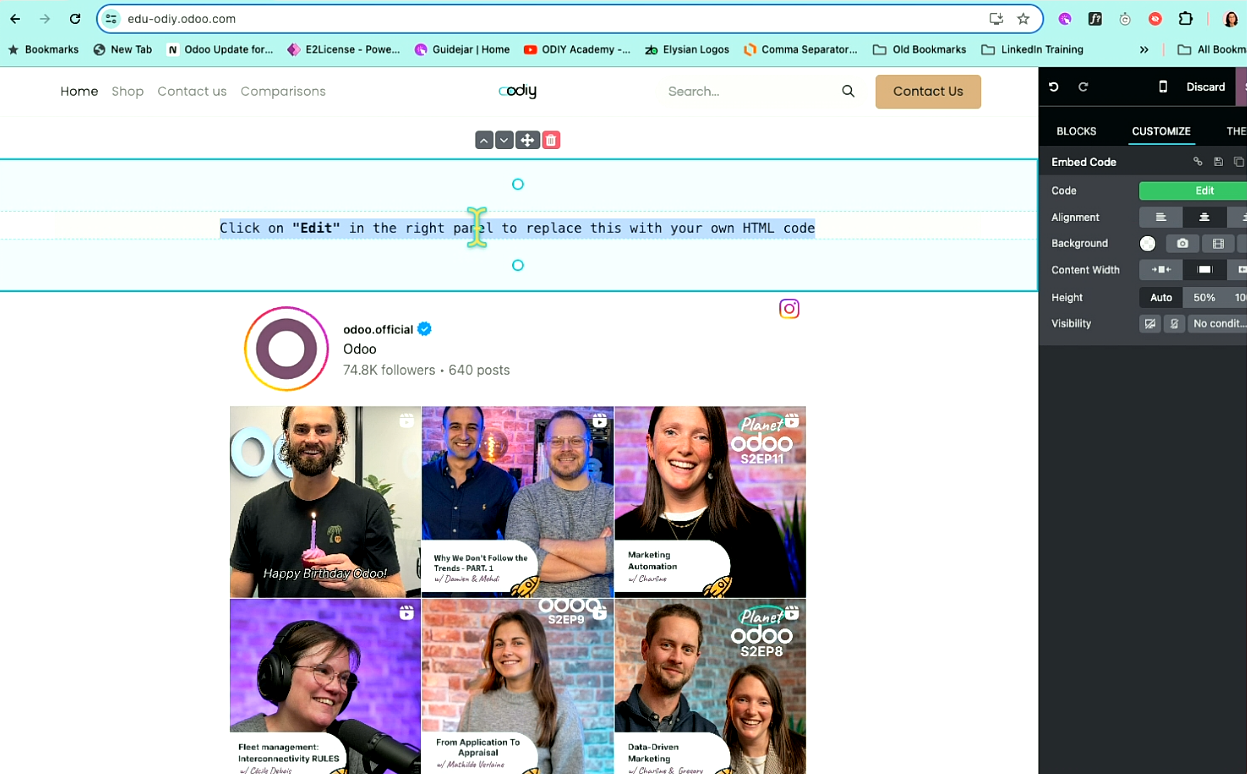
- Preview and Adjust: Ensure everything looks perfect by previewing the page. Adjust any settings if necessary to make sure the widget integrates well with your site’s design.
Best Practices for Custom Widgets
- Device Optimization: Make sure your widget looks great on all devices by testing various display settings.
- Security Measures: Always check the security settings of any external content you integrate to maintain your site’s integrity.
- Keep Content Updated: Regularly update the content within your widget to keep it relevant and functional.
Your Enhanced Odoo Site
By following this guide, your Odoo website will be more than just informative; it will be an interactive experience that keeps users engaged and coming back for more. This customization not only enhances the user experience but also provides a fresh and modern feel to your digital presence.
For a detailed walkthrough on setting up and customizing your Image Hotspot widget, click here for the full tutorial. This resource is designed to help you leverage advanced features and make your website a standout in the digital landscape. Additionally, to explore a comprehensive list of widgets that can further enhance your site, visit the ODIY Academy Web Widgets page. Dive in, explore, and elevate your website with confidence!